All sorts of old junk can be recycled and made into attractive planters
No crops are more nutritious than those picked from your own garden. Assuming you’re choosing to grow organically, they will be packed with more vitamins and minerals than shop-bought goods that were probably harvested a few days ago.
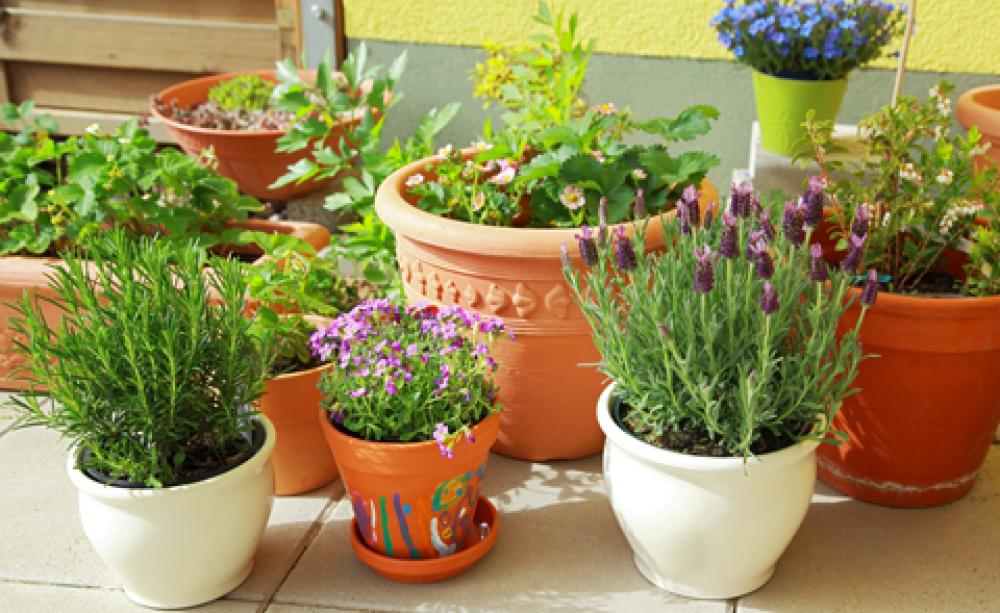
It isn’t necessary to have a sizeable garden to produce a decent crop – you can grow most salads and vegetables in containers. Some (such as carrots and potatoes) require deep pots, but many edibles (including spring onions, herbs, radishes and lettuces) will grow in shallow window boxes. Even climbing crops (such as cucumber, peas and small squash) can be grown in containers with the aid of sticks, such as hazel.
Littering your roof terrace, patio or windowsills with growing vegetables doesn’t have to look ugly. You can grow colourful produce (such as rainbow chard and orange beetroot) and edible flowers (such as calendula and nasturtium) in cheery eco bags and pots and painted vintage crates (suppliers include henandhammock.co.uk and vintagecratesuk.co.uk).
All sorts of old junk can be recycled and made into attractive planters: tin cans, buckets, wellies, car tyres, gutter pipes... anything that can have drainage holes drilled into it, will do. Bits of unwanted wood can be nailed together and painted to make pretty windowboxes. Raid the attic!
Here are 4 easy container crops to try:
SPROUTING SEEDS
Sprouts, such as alfalfa and mung bean, are nutritious and tasty, and you can grow them indoors on the tiniest windowsill:
1-Either make your own sprouter by perforating the base of a plastic container with lots of tiny holes or buy a ready-made sprouter (for around £15) from www.rawliving.eu or www.skysprouts.co.uk (both companies also sell seeds for sprouting).
All sorts of old junk can be recycled and made into attractive planters
2-Make sure the sprouter is clean.
3-Spread a layer of seeds over the base and rinse them with water. Let the water drain out.
4-Sit the container on a windowsill (ideally somewhere cool).
5-Rinse the seeds morning and night with cold water, letting it drain each time (the seeds should be moist but never submerged in water).
6-The sprouts should be ready for harvesting in 4-5 days and will keep in a jar in the fridge for a few days. Sprinkle them on salads or put them in sarnies.
STRAWBERRY HANGING BASKETS
In her fabulous new RHS book Grow Your Own Crops In Pots, Kay Maguire (£16.99, Mitchell Beazley) demonstrates how to make a pretty hanging basket of strawberries:
1-Use the hanging basket liner (eco liner is available at www.greengardener.co.uk) as a marker to cut out a circle of oilcloth (you can often find these wipe-down fabrics in charity shops), the more colourful the better!
2-Place the oilcloth in the basket, then puncture some holes in it with scissors.
3-Then put the liner on top and fill the basket two-thirds full with organic potting compost.
4-Sink a small pot with drainage holes in the centre of the basket then space six strawberry plants evenly around it. Put compost around these and smooth it out. Water well and hang it up.
5-Water your basket little and often.
6-Once fruit appears, put straw on the soil surface, around each of the plants.
CUT-AND-COME-AGAIN SALAD LEAVES
The fact that salad leaves regrow when you cut them young is one of Nature’s bounties. Snipped when they’re just 4-8cm high, they are tastier and more nutritious than mature leaves.
1-Order the seed you want – many salad leaves can be grown as cut-and-come-again, including mizuna, red kale, rocket, sorrel and spinach. Otter Farm (shop.otterfarm.co.uk) sell a nice seed mix.
2-Make sure your container has drainage holes and, if it’s wood, line it with plastic (that you have cut with drainage holes). Fill with organic potting compost and make drills with your finger, 10cm apart. Water with a rose head. Dot the seeds along each drill, a finger’s width apart, and cover with a very thin layer of soil, with your finger.
3-Place on a cool windowsill or outside (nowhere too hot).
4-Keep the soil moist, but don’t over-water.
5-When they are ready to harvest, cut the leaves in the morning with clean scissors, leaving 2cm of stem.
6-If you don’t want to eat them straight away, keep them in a bag in the fridge. Don’t wash them until you’re about to eat them to ensure they stay fresh as long as possible. The plants will give you 3-4 lots of cutting and then you will have to re-sow.
POTATOES IN SACKS
You can grow spuds in any deep container that has drainage holes. In her new RHS book Grow Your Own Crops In Pots, Kay Maguire (£16.99, Mitchell Beazley) suggests growing them in eco sacks:
1-Order some colourful eco sacks online (from www.turtlebags.co.uk or www.thenaturalgardener.co.uk). Meanwhile chit your potatoes: put seed potatoes in an old egg box in a cool, light place. The ‘rose end’ (that has the buds) should be facing upwards.
2-Once the shoots are 1-2.5cm, you can start planting. Put 20cm of organic potting compost into the bottom of the bag and then mix in a scoop of potato fertilizer (comfrey is a great organic fertilizer: either comfrey leaves or comfrey tea).
3-Place the chitted potatoes in the compost, rose end up and then cover with 10-20cm more compost and water in.
4-Water regularly and lay comfrey leaves atop the compost (or pour in comfrey tea) every couple of weeks.
5-As they grow, keep adding compost to the bag at regular intervals, covering the shoots and leaves each time. Continue until the compost is 5cm from the top of the bag.
6-Early varieties are ready to harvest when the plants flower, but most are harvested once the foliage has begun to fade.
Hazel Sillver is a freelance journalist and a contributor to the Ecologist Green Living section; email: [email protected]
If you found this article interesting and enjoy reading articles on the Ecologist website, please consider making a donation to support the continuation of this free service.
Image of produce in pots courtesy of www.shutterstock.com


